Category : Lessons

Blog Fitness Lessons Uncategorized

Swing, Flip, Catch, Squat, Press

This series of movements is highly challenging on many levels and a whole lot of fun. The swing, flip, catch, squat and press is actually one of my very favorite kettlebell moves and I hope you enjoy it too. All of these movements combined will use a little bit of everything; power, strength, coordination, flexibility and cardiovascular endurance. I don’t recommend performing this sequence indoors, sand or grass is best. While a rubber gym floor may keep the bell and floor protected, it might have a tendency to bounce the bell in an unpredictable way. Practice outside at first and even then, remember quick feet are happy feet. I have never seen anyone drop a bell on their foot in over ten years, but anything is possible! Before you try this advanced move, make sure you have all of the basic kettlebell moves down, including the kettlebell swing, kettlebell clean&press and kettlebell snatch . As always, start with a very manageable weight and move up slowly as you build confidence and strength.

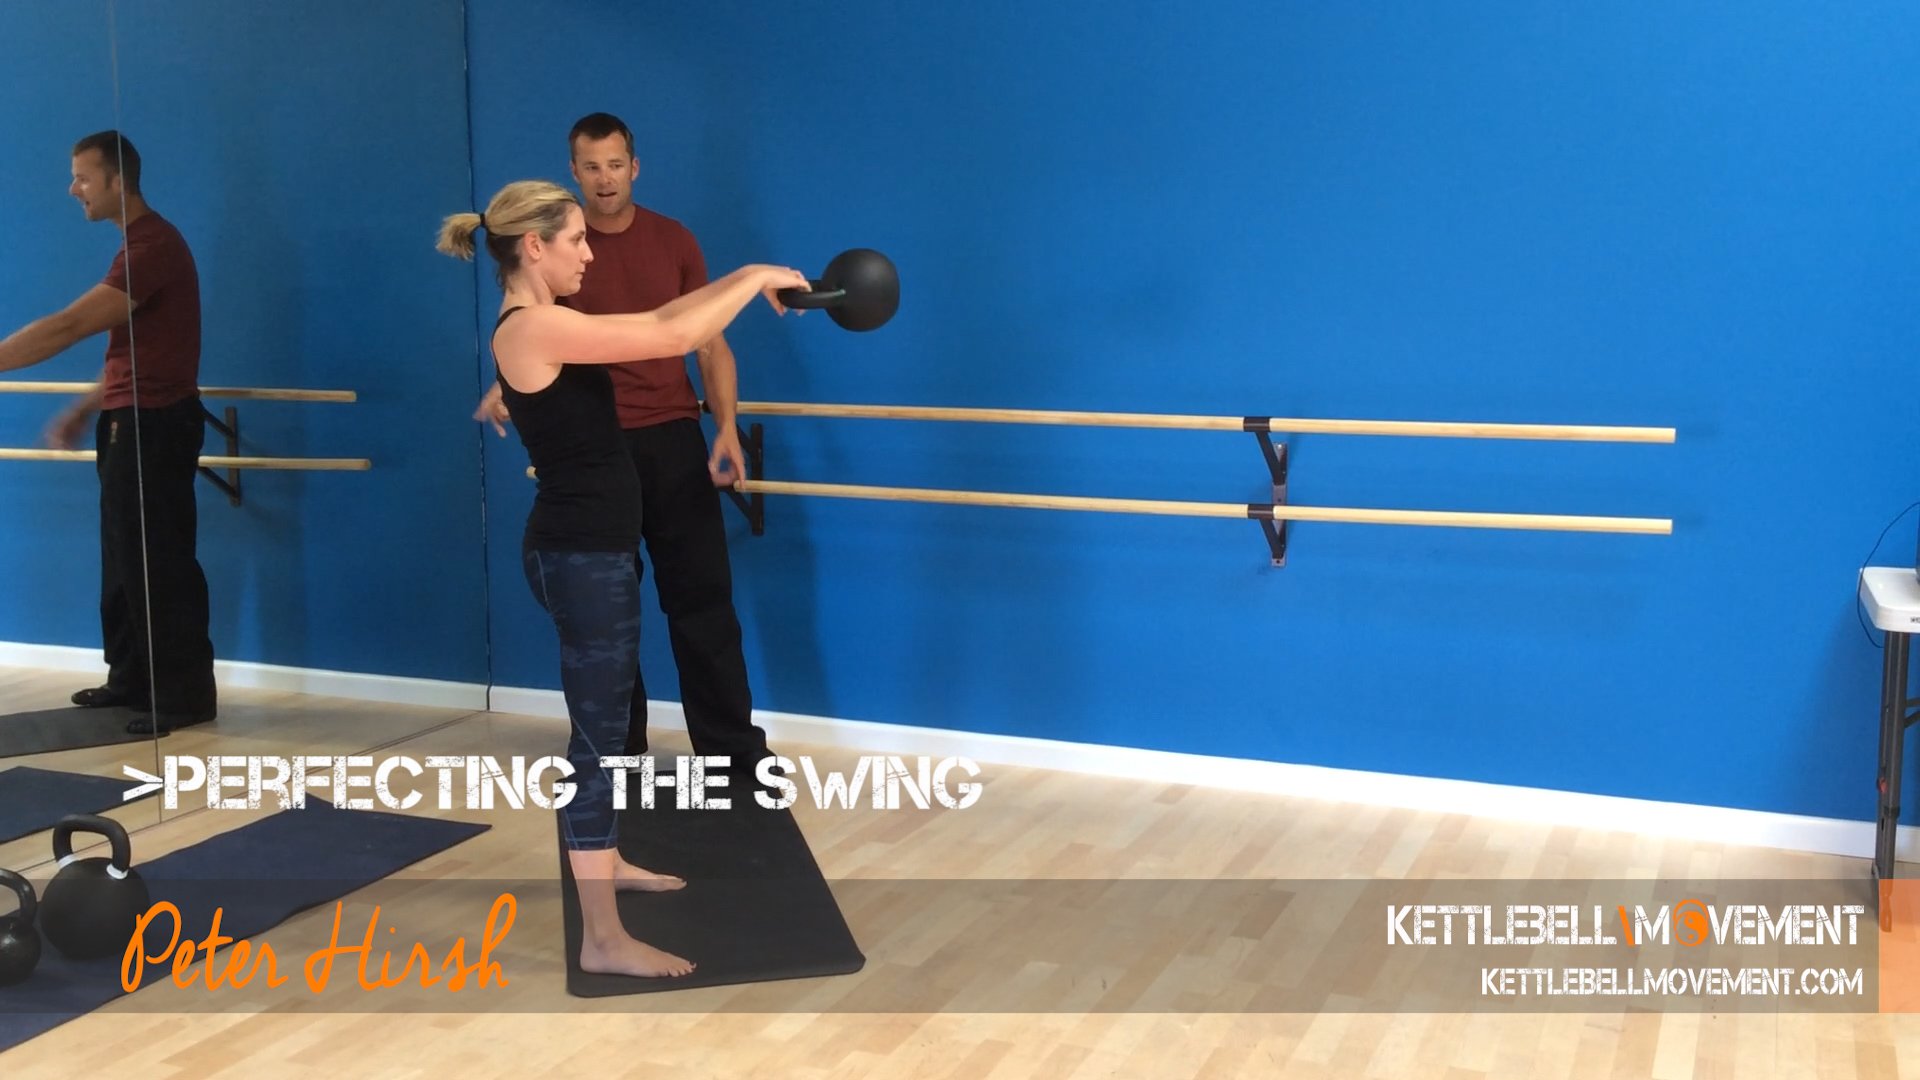
The swing, flip, catch, squat, press begins with a two handed swing. With a rotational release flip the kettlebell at the top of the swing.

Catch the base of the bell with both hands after about three quarters of a flip, it should be handle up. Try to keep the bell relatively close to you as you swing it up. Pull it in slightly as you release it to make the catch as easy as possible.

Allow the catch to sink you into a squat, almost as a shock absorber for the weight, squat as deep as you can without rounding your back.

Keep your torso upright and stand up from the squat, press the bell overhead using the momentum from your legs.

Lower the bell back to the shoulder, release the bell from your grip and catch the handle as it falls. Absorb the weight of the bell with your hips in a backswing, then swing the bell back up.

Wash rinse and repeat.

It will surprise you how quickly these will get the heart rate up. Just as you start to learn the move, you’ll have to break for breath. Be careful in the overhead position not to arch your back, this is common with people lifting only one arm overhead, let alone two! Tight shoulders are very common and will make even the strongest person struggle to lift and hold weight in the overhead position. Enjoy this exercise and feel free to add it to your kettlebell juggling practice or any circuit or routine.
Thank you for joining me,
Peter Hirsh

Read More
Blog Fitness Flexibility Lessons

Cossack Squat Lesson

Today I’m going to teach you how to perform a fantastic hip opening exercise, the cossack squat. This exercise can be done bodyweight or with a weight held out front as a counterbalance for your bodyweight. If you are tight in your hips, you might struggle to keep your torso upright as you move hips down. Instead, if you move hips back, you will need to forward lean to prevent yourself from falling backward. If you get the basic movement down and wish to challenge yourself more, try using a heavier weight.

The Cossack Squat

  • Begin with a wide stance, depending on your leg length.
  • Keep the leg you are squatting over aligned from hip to knee and down to the foot.
  • Keep the foot very flat on the side you are squatting, don’t come up off your heel.
  • Point your other toe upward with the heel down, rotate at the hip so your knee is pointing straight up.
  • Sit down into your hips, keep your back flat and don’t let it round at the bottom.
  • Push up to standing through the planted foot, keeping it very flat, distributing the weight evenly.

Use this exercise at the beginning of your routine to open your hips up for the workout. They are very challenging so take your time and develop proper technique. If you have tight glutes or hamstrings you may struggle at first. Keep challenging yourself and you will increase your mobility very quickly with this exercise. The cossack squat will also enhance your overall body awareness which will carry over to other exercises.

Thanks for joining me today,
Peter Hirsh

Read More
Blog Lessons

Squat to press

When it comes to big bang exercises, the squat to press is as big as they come. When it comes to real world movement, the squat to press is the way to move weight from your shoulder to over head with as much capability as possible. This means you can lift more which equates to more calories burned and more muscle built. The squat to press will also train you evenly from head to toe and is variable. Meaning you can use a single bell, a barbell or one bell in each hand. You can also add some instability by standing on a BOSU ball or Airex pad. The squat to press will train your core, legs and upper body and drive your heart rate through the roof if you use enough weight!

Begin with the weight at shoulder level and squat down into your hips. Make sure to keep your feet flat on the ground and your back flat. I often see people roll their feet inward or outward as they sit down into the hips. It is also common to round your lower back if you go deeper than your hamstring flexibility will allow. As you sit down, try not to lean forward with the upper body, as you would in a bend and extend movement with the hips. Keep the upper body vertical to make the weight in your hand feel as light as possible.

As you stand out of your squat, stand through very flat feet and push as straight upward as possible. Try to accelerate gradually as you get further out of the squat and transfer that energy into the weight in your hand. As you get to standing, use the power from your legs to assist the overhead press.

The overhead position isn’t complete until you reach lockout. Lock the elbows and sink the shoulder blades down the back. The weight should be balanced and easy to maintain in this position. Carefully lower the weight back to the shoulder, and repeat the move.

You can add this exercise to any part of your workout, the pushing exercise by nature will be easy on the grip muscles, so feel free to deadlift, swing, row or pull up as a great complement to the squat to press in any circuit. Don’t underestimate the cardiovascular impact, using all of these muscles at once will be demanding and probably shouldn’t be done with wind sprints and battle ropes!

Thanks for joining me,
Peter Hirsh

Read More
Blog Fitness Lessons

Lateral Squat Lesson

Welcome to Kettlebell Movement, today we are going to learn the lateral squat. This exercise isn’t well known, but is an awesome core trainer that will also require technique and stamina. The lateral squat can be performed with an exercise band or a mid level pulley and adjustable weight stack.

Lateral Squat Tips

  • Stand with the handle in both hands and use a comfortable grip. I like interlocked fingers but it’s up to you what feels best. Move your hands directly in front of you, it should be pulling you directly sideways either left or right. Pull your shoulders down and back in the joint, don’t shrug.
  • Inhale, brace deeply with your abdomen and squat downward through your hips. Keep your back flat and feet flat on the ground. Try to eliminate any excess forward lean.
  • Maintain good alignment and go as deep as you can without rounding your back, or until you hit rock bottom.
  • Stand up straight, to a tight plank position and repeat each rep without releasing the weight. Exhale.
  • Switch sides after a set of six to fifteen reps (depending on the weight used).

This is one of those exercises that if you saw someone doing it, you wouldn’t think much of it but in truth, it’s extremely challenging. A resistance band that doesn’t seem to have enough tension to challenge you in other things will be more than enough to make you very sore with this exercise. You will probably feel it in your abdomen and obliques, a very deep muscle soreness in all the right places. As I mentioned, it is also quite a cardio blast so feel free to add it to a circuit for some interval training. This exercise works well with pushing, pulling and lunging exercises. I love what the lateral squat does and you will see it used in our workouts here on Kettlebell Movement.

Thanks for joining me,
Peter Hirsh

Read More
Blog Fitness Lessons

Bend To Extend With Row

Of all of the seven primal movements, none of them will allow you to move as much weight as a bend to extend movement with your hips. This exercise uses the strongest lifting muscles of your body, the glutes and hamstrings, to lift anything heavy off the ground. When it comes to the upper body, pulling is considerably stronger than pushing and the combination of the two will deliver some real power. You will also add a little bit of rotation in your torso with this exercise when performed with one hand, which will allow you to generate even more strength. Today I am teaching you how to use the bend to extend combined with a pulling movement to develop glutes and abs of steel when training in the gym. I recommend you learn how to deadlift, with excellent technique before trying this progression as it is the foundation of this power phase move. Keep your feet flat, stay in control of the weight, and don’t forget to breathe (breathe in, come down, power up, breathe out).

The first way I am demonstrating this combination is using a resistance band that will allow me to rep out one hand and then switch to the other. In the gym, you can use a low pulley with an adjustable weight stack for almost unlimited challenge. This variation is best when done to a one-two-three count from beginning to end. Count one is returning the hand from hip to straight out front (reversing the row), the two count is bending at the hip and the three count is the bend to extend with row follow through in one smooth motion. Make sure you are using your hips to make the row feel lighter.

The second demonstration for this exercise, is pulling a rope with a kettlebell tied at the end of it using a hand over hand motion. This variation will make you switch hands with each pull and you will definitely notice the rotation side to side with each rep. I really like this variation, it seems like such a natural movement that we don’t often get to do in the gym. You will of course need a rope, a bell and the appropriate amount of space to do this. I have personally had many workouts where I pulled a heavy kettlebell around the perimeter of a park for forty five minutes using this technique.

In addition to training some major muscles with this exercise, you will also drive up the heart rate very quickly, you will be sore in your glutes, upper back, abdomen and maybe even your grip from this exercise. It will demand excellent concentration to combine these movements this way, stay focused and keep your core tightly braced as you drive through those hips. Have fun with this exercise and see how you can mix it up using both hands, different equipment, or even while standing on something completely unstable!

Thanks for joining me,
Peter Hirsh

Read More
Blog Fitness Lessons

Kettlebell Juggling Lesson

Kettlebell Juggling Lesson:

Although it may seem a bit intimidating at first, kettlebell juggling can be a lot of fun. Once you have learned how to swing, clean and snatch with such precision that you can’t get it wrong, consider trying some throws and catches in the grass or sand.

Learning the clean to catch and snatch to catch may be a good starting point to develop the grip strength and coordination for this lesson. To begin with, develop the two handed swing-flip-catch, rotating the bell downward and catching it as it comes back up at the weightless moment at the top of the swing. Learn how to keep the handle stable as you release it, if it twists in the air, it will be very hard to catch. Once you have developed this move, try the one handed variation using the same rotation. The figure eight involves a hand to hand switch at the bottom of the move, try flipping the bell at the top and go from hand to hand.

You will most likely drop the kettlebell as you learn this so make sure you are doing it far way from anything breakable and on a soft surface. A kettlebell could bounce off a rubber gym floor and head off in any direction! Generally if you drop the bell it’s out front of you and not likely to hit your feet, but pay attention and get ready to move out of the way if need be. Juggling kettlebells in this way isn’t all about looking cool, it will help you develop amazing grip strength as well as coordination and focus. You really have to have the basics completely nailed before you even attempt these moves. You will use these basics with every toss, flip and catch! I have even done this kind of thing with two people throwing the bell back and forth, now that requires skill and trust! I always reach for the hard style bells for these kinds of exercises. While sport bells may have their advantages, this is an area where hard stlye can be more versatile. When choosing your weight for kettlebell juggling it’s important to remember that too heavy is never a good idea but very light bells are harder to stabilize in the air. Find the right weight hard style bell for you. Have fun playing around with this technique, you can combine this with the clean to catch, snatch to catch and even some bottoms up training for some added challenge. I will be providing you with a kettlebell juggling workout soon enough!

Thanks for joining me today,
Peter Hirsh

Read More
Blog Fitness Lessons

The Renegade Row

The Renegade Row:

Thank you for joining us on Kettlebell Movement for a lesson on the renegade row. This is a very difficult progression of a weighted row combined with a tight plank position. You can do this exercise with dumbbells or kettlebells. As always, start light and work your way up slowly.

Start in the prone plank position holding on to the weights, then take one hand off and stabilize in a one handed plank, switch hands. Once you have the hang of stabilizing in this way, begin the row. Pull the weight off the ground, keeping your forearm close to your body. Squeeze your shoulder blade inward as you pull, then return the bell back to the ground gently. You can either switch with each repetition or rep out one side and then switch. Don’t forget to breathe with each rep.

Many people tend to go into a downward dog when performing this exercise without realizing it. Keep your glutes flexed and your abdomen tight! It is also common to arch the back by allowing your pelvis to tilt down in the front and up in the back. Squeezing the glutes and abs should help this too, just make sure you aren’t arching your back. You may use a slightly wider stance with your feet, especially at first, to add a little stability if needed.

You can add this exercise to your existing workouts, it goes well with many other movements. Even though it is extremely challenging, it isn’t likely to take any one muscle to failure. The fantastic part about this exercise is that it requires strength in so many areas. You will need some extremely deep core tension combined with stability and upper back pulling strength. If you are combining this in a circuit, it will keep the heart rate up as well. As with all of the lessons I teach, I will use this exercise in future workouts, so practice it now so you can play along with us.

Thank you for watching and reading!

Peter Hirsh

Read More
Blog Fitness Lessons

Clean to Catch and Snatch to Catch

Kettlebell Juggling:

Welcome to Kettlebell Movement!

Today we are going to learn two of the most basic moves, the clean & press and snatch - with a catch! For this move, you will need a medium to light bell, preferably of the hardstyle variety. You should be extremely proficient with both the kettlebell clean&press and kettlebell snatch before even thinking about attempting this move. The added challenge here isn’t so much in muscle fatigue, or even heart rate, but in concentration. With that in mind, you will probably notice quickly that your grip is challenged far more than in the standard variations of these lifts.

Begin this lesson by learning the clean to catch, consider using both hands as you catch the bell at first. One to catch the bell, the other to stabilize it as it lands in your palm. The basic move stays the same but you will be releasing the bell at the float point. Keep the bell very close to your hand, think about sliding your hand from the handle to the ball of the bell with as little loss of contact as possible. Try not to let the bell twist as it floats, it will make it difficult to catch and even more difficult to catch the handle on the way back down. Practice this exercise with high reps of a light bell to get the hang of it before moving up in weight. You might notice that if you use a bell that is too light, it becomes harder to control and has a tendency to twist and move more in mid air. This will make the catch of the ball of the bell on the way up and the handle on the way down much more difficult. Find the right balance of light and not too light when choosing which weight to use.

Once you have developed the clean, learn the press and even the push-press and jerk. These are both challenging because you will have to learn excellent finesse in order to use power, without over powering the bell. Overpowering the bell will make you lose grip on the bell and cause it to fall. Once you have learned how to get the bell overhead you can also practice windmills and overhead squats with the bell in your palm. I am a big fan of the top-down Turkish Getup, so feel free to give that a shot too! The clean & press will soon transition into the snatch, which will demand you to use the upmost control and precision especially if you plan on performing multiple reps. Making the bell land exactly in the right position of your palm so that you can catch it on the way down can be tough. Keep your eye on the bell the whole time and just like with the clean, feel free to use your free hand to stabilize the bell as you catch it. I will be providing a video on this move in the near future so stay tuned.

You will probably feel this in the usual muscles; glutes, hamstrings and back, and even more so in your grip. When I first began learning this move I remember being blown away by how quickly my ability improved in a short period of time. These moves have a way of training your grip muscles in a way nothing else can. I hope you notice the same rate of improvement that I did. Have fun learning this lift, and remember, if you lose control at any point, quick feet are happy feet!

Thanks for practicing with me today, I will use this move in future workouts so take the time to practice up. More than anything, I hope you enjoy your practice. Kettlebell juggling moves such as this will keep you motivated and seeing great results for a long time to come.

Peter Hirsh

Read More
Blog Fitness Lessons

The Kettlebell Pull Over

The Kettlebell Pull over:

Today’s blog and video is going to focus on a lesson on “the pullover.” This exercise is excellent for developing shoulder mobility as well as basic core strength. The pullover is performed laying on your back and can be done with either a single weight held in one hand two separate weights or open-chain. The pullover is not a kettlebell specific exercise but can be performed with barbells and dumbbells as well. This exercise will lengthen your lats, intercostals and triceps and may cause you to feel sore from this lengthening. You will also quickly notice that the pullover is very demanding on your abdomen. Make sure to bend your knees and flatten your feet to prevent your back from arching as the weight moves behind you. To reap the full benefit of this exercise it’s important to brace deeply in your abdomen as you perform each rep.

The Supine Pull over

1) Lay down on your back, knees bent and feet flat on the ground with the intended weight by your shoulder. Press the weight above your chest to straight arms at the elbow, make sure your wrist isn’t folded backward.

2) Pull your shoulders down and back - make sure you aren’t shrugging or protracting your shoulders.

3) Inhale, brace with your abdomen, and slowly control the weight to just above the ground. If you are laying on a bench (raised off the ground) you may take the bell as far back as the overhead position.

Note: if you can’t perform this phase without arching your back, you should regress to more basic core stabilization exercises before attempting this lift again.

4) Lift the weight back up to it’s starting position using your lats, keeping your shoulders down and back. Exhale.

This exercise will increase your ability to lift weight overhead. When performed with dumbbells (or even cables) the pullover can be done alternating arms for added challenge. As I mentioned, your lats, triceps and abs will be sore from this exercise. The pullover can be performed with light weight to warm up for overhead training or with heavier weight to build excellent strength in this range of motion. This exercise works well in combination with any of the three primary kettlebell lifts as it is unlikely to fatigue the muscles used in those lifts. This exercise is different, fun and is bound to make you feel like you worked out. We will be utilizing this exercise in our Kettlebell Abs workout video coming out Friday.

Have fun and thank you for practicing with me today!

Peter Hirsh

Read More
Blog Fitness Lessons

Functional Kettlebell Warm Up

Functional Kettlebell Warm Up:

In this video I am going to take you through a functional kettlebell warm up that will be appropriate for almost any of the workouts we post in our Friday videos. I highly recommend that you begin each workout with a warm up and that you consider the exercises you are going to perform in your workout when you do. You may notice that your workouts have a natural progression of exertion as you go. Starting with mild effort while using highly functional motor patterns will warm your body up safely and unify your mind and body. As you progress, you may tend to favor strength phase and then explosive lifts, which will also bring about the inevitable cardiovascular challenge.

A cool down period is also a good idea, make sure you don’t drop to the floor out of exhaustion the moment you finish your last rep. To avoid unnecessary stress on your heart when you are done with any high heart rate exercise make sure you walk it off instead of dropping to the floor. When you are done with your practice, feel free to implement strategic stretching and self-myofascial release. A foam roller is one of many pieces of equipment that can be used to self-massage your muscles that need the most help. For a small investment, this tool is invaluable.

Let’s begin today with a functional warm up of:

Deadlifts
The movement of lifting something off the ground, use a light weight and concentrate on the safest and most efficient motor patterns you can achieve.

Backward-stepping lunges
This is about opening up those chronically tight hip flexors and will also help wake up your balance and stability.

Static overhead hold
This is another learning move, lift a very light weight overhead and learn the overhead loaded lat position. Dig deeply and feel the weight sinking down into your shoulder. Align the weight directly over it’s plumb line and align your entire body to neutral posture.

Double bell overhead hold
This is much harder than the one handed hold. The flexibility in your upper, mid and lower back will be tested. The ability for your nervous system to relax while staying strong will also come into play. Remember, real world strength is always made up of equal parts of tension and relaxation.

The importance of good technique and posture when lifting overhead cannot be understated and much of kettlebell and strong person exercise uses overhead lifting of weight. It is crucial for functional ability and a wonderful tool for developing core strength and good posture. You can also consider moving on to exercises such as the turkish get up, windmill and overhead squat. These are all variations of moving under weight. Have fun with your practice today, whatever it may be. If you are not sure what you would like to do, then just check out our youtube playlists for either a beginner, intermediate or advanced workout! Grab your bell and lets get started!

Peter Hirsh

Read More
1 2 3 4 5